
Looking for a dessert that’s easy, delicious, and guaranteed to impress? Then you’ll love this Keebler cheesecake recipe, which combines convenience and indulgence in one creamy, no-bake treat. With its buttery graham cracker crust and velvety cream cheese filling, this cheesecake delivers rich flavor with minimal effort. It’s perfect for beginners, busy families, or anyone avoiding the oven.
Moreover, this recipe doesn’t just save time—it opens the door to endless customization. Whether you’re prepping a last-minute dessert or planning ahead for a party, this guide will walk you through every step. You’ll learn how to whip up the filling, customize toppings, avoid common mistakes, and get picture-perfect results every time. Best of all, it’s a hit with all ages and tastes.
Table of Contents
The Sweet Simplicity of Keebler Cheesecake
When time is tight but expectations are high, a Keebler cheesecake recipe is the answer. The star of this dessert is the ready-made graham cracker crust from Keebler. It provides a crisp, golden foundation with just the right hint of sweetness. Because it’s pre-formed and ready to go, it also eliminates the need for baking, measuring, or mixing a homemade base.
Equally important, the no-bake filling blends rich cream cheese and whipped cream for a texture that’s both light and luscious. This filling sets in the fridge, which means there’s no need to heat your oven—or your kitchen. You can prepare it the night before and have a ready-to-serve dessert by the next day.
Additionally, this recipe is ideal for both seasoned bakers and beginners. It involves simple techniques but yields impressive results. Sooner or later, it’s bound to become your go-to dessert for family dinners, holidays, or even summer picnics.
For more sweet inspiration, you can also explore our full recipes archive filled with both savory and sweet favorites designed to suit every occasion.
Why Everyone Loves This Keebler Cheesecake Recipe
This dessert doesn’t just win on flavor—it excels in versatility, speed, and presentation. Firstly, it can be made in under 30 minutes. Once chilled, it slices cleanly and holds its shape, offering both form and function.
Secondly, the recipe is endlessly adaptable. For instance, you can add a berry compote for a summer vibe, swirl in peanut butter for richness, or dust it with cocoa for a chocolatey twist. It’s this adaptability that makes it so popular among home cooks.
Also, the recipe travels well. That makes it a great option for potlucks, picnics, and bake sales. Since it’s served cold, there’s no need to reheat or fuss with presentation—just slice and enjoy.
Lastly, this cheesecake is kid-friendly. Because it doesn’t involve raw eggs or baking, little ones can help with mixing, spooning the filling, or choosing toppings. It’s a fantastic way to introduce kids to the joys of cooking while creating special memories together.
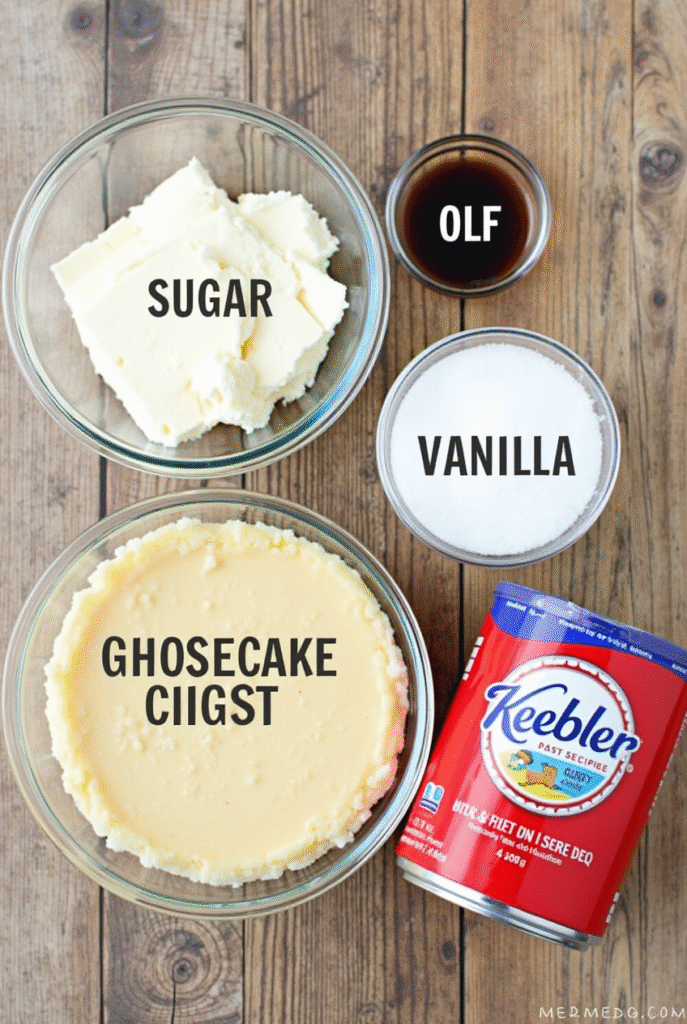
Ingredients for a Classic Keebler Cheesecake Recipe
Although this recipe tastes gourmet, the ingredient list is refreshingly short. You’ll need just a handful of items, most of which are kitchen staples. Below is the expanded table of ingredients, complete with optional substitutions and tips for the best results.
Ingredients Table
| Ingredient | Amount | Tips / Substitutions |
|---|---|---|
| Keebler graham cracker crust | 1 pre-made | Can sub with Oreo or chocolate wafer crust |
| Cream cheese (softened) | 16 oz | Use full-fat for best structure and taste |
| Granulated sugar | ¾ cup | Can substitute with powdered sugar for smoother texture |
| Vanilla extract | 1 tsp | Real vanilla enhances depth of flavor |
| Heavy whipping cream | 1 cup | Cool Whip can be used for convenience |
| Optional toppings | As desired | Try berries, chocolate drizzle, crushed cookies |
Moreover, you can personalize this recipe with a dash of lemon juice, almond extract, or cinnamon in the crust for a unique twist. Just be sure to keep proportions balanced to maintain the creamy consistency.
Additionally, remember that room temperature cream cheese blends better and avoids lumps. If you’re short on time, microwave it in 10-second bursts until softened.
How to Make the Perfect No-Bake Keebler Cheesecake
Now that your ingredients are ready, let’s break down the process into easy, actionable steps. Follow this method closely to create a cheesecake that’s smooth, stable, and undeniably delicious.
Step-by-Step Instructions
Step 1: Beat the Cream Cheese and Sugar
To begin, place the softened cream cheese in a large mixing bowl. Beat it with a hand mixer on medium speed until it’s fluffy and lump-free. Next, gradually add the sugar. Continue beating until everything is fully combined and smooth.
Step 2: Add the Vanilla Extract
Then, add the vanilla extract. Blend again for about 30 seconds to distribute the flavor evenly. The mixture should look creamy and thick at this point.
Step 3: Whip the Heavy Cream Separately
Meanwhile, pour the heavy cream into a clean bowl. Beat it until stiff peaks form, which usually takes 3–5 minutes. You’ll know it’s ready when the cream holds its shape without collapsing.
Step 4: Fold Whipped Cream into Cream Cheese Mix
After that, gently fold the whipped cream into the cream cheese mixture. Use a spatula and light, circular motions. Avoid over-mixing to preserve the airiness of the filling.
Step 5: Fill the Keebler Crust
Following the folding step, spoon the mixture into the pre-made Keebler graham cracker crust. Smooth the top with a spatula to create an even surface. Feel free to add a design or swirl if you’re feeling artistic.
Step 6: Chill to Set
Place the cheesecake in the refrigerator for at least four hours. However, overnight chilling provides the best texture and flavor development. Resist the urge to cut early—the wait is worth it.
Step 7: Decorate and Serve
Finally, just before serving, add your favorite toppings. Sliced strawberries, raspberries, or crushed graham crackers all make for tasty, photogenic additions.
Storage Tips and Smart Serving Suggestions
Storing the Cheesecake
To store your cheesecake, cover it tightly with plastic wrap or foil. Keep it refrigerated and consume within 5 days. For longer storage, freeze individual slices on a tray, then wrap and store them in a freezer bag.
Serving the Cheesecake
Always use a sharp knife dipped in hot water for clean slices. Wipe the blade between cuts to maintain neat presentation. Serve on chilled plates for best results, especially in warm climates.
Transporting the Cheesecake
If you need to transport your cheesecake, place it in a cake carrier or a sturdy pie box. Use ice packs underneath if traveling for more than 30 minutes. Avoid placing toppings before travel—add them just before serving for a fresh look.
Troubleshooting Common Issues
Even simple desserts can sometimes go sideways. So, let’s walk through common issues and how to avoid them:
- Runny Filling:
This usually happens when the whipped cream isn’t beaten enough. Always make sure stiff peaks form before folding. Also, avoid low-fat cream cheese, as it contains more moisture. - Lumpy Texture:
This occurs when cream cheese isn’t fully softened. Let it sit at room temperature, or microwave briefly. Scraping down the bowl during mixing also helps ensure even blending. - Soggy Crust:
Although rare with a Keebler crust, sogginess can happen if the filling is too thin. Stick to the measurements and allow enough chilling time.
For another easy recipe that avoids complicated steps while offering rich flavor, consider trying the canning cranberry sauce recipe. It’s especially great as a seasonal topping for this cheesecake!
Looking for More Ideas?
For more delicious, no-fail recipes like this Keebler cheesecake recipe, be sure to browse the full recipe collection. You’ll find creative ideas for every meal and occasion, whether you’re cooking for two or feeding a crowd.
Creative Twists and Add-Ons for the Perfect Keebler Cheesecake Recipe
Following a flawless execution of the base recipe, it’s time to get creative. Although the classic version of this Keebler cheesecake recipe is already a winner, many home cooks find joy in putting their unique spin on it. Therefore, this section explores tasty twists, fun serving ideas, and clever adaptations that enhance flavor, texture, and presentation.
Moreover, these add-ons make your cheesecake adaptable to different seasons, holidays, and dietary preferences. Whether you’re making dessert for a weekend dinner or a festive gathering, these ideas ensure your cheesecake stands out.
Seasonal Flavors and Creative Swirls
Pumpkin Spice Fall Swirl:
To achieve a cozy, fall-inspired cheesecake, add ½ cup of pumpkin puree and a pinch of cinnamon, nutmeg, and allspice to the cream cheese filling. Then, swirl with a fork to create a marbled look.
Berry Burst Summer Delight:
During summer, fresh berries shine. For instance, gently fold sliced strawberries or blueberries into the cheesecake mixture, or spoon them on top before serving for vibrant color and juicy bursts.
Chocolate Hazelnut Indulgence:
Additionally, mix two tablespoons of hazelnut spread into half the filling. Layer it over the base filling to create a beautiful two-tone, nutty dessert.
Graham Cracker Crust Reimagined
Although the pre-made Keebler crust is undeniably convenient, some bakers enjoy crafting their own base for added customization. In such cases, you can crush graham crackers and mix them with melted butter and brown sugar. Press this mixture into a springform pan and bake for 5–7 minutes for a firmer, toastier crust.
Also, other alternatives include:
- Crushed Oreos for chocolate lovers
- Ginger snaps for a spicy twist
- Digestive biscuits for a European flair
Serving Presentation and Decor Ideas
Presentation elevates a dessert from tasty to unforgettable. Therefore, consider adding these final touches:
Fruit Glaze Drizzle:
Microwave fruit jam with a splash of lemon juice and drizzle it over the top just before serving. Raspberry or apricot works beautifully for both flavor and visual appeal.
Piped Whipped Cream Rosettes:
Use a piping bag and star tip to add decorative whipped cream along the edges. This creates a polished, bakery-style finish.
Themed Garnishes:
For holidays, use candy cane crumbles, heart-shaped strawberries, or edible glitter. These small details make your cheesecake celebration-ready.
Storage Hacks and Make-Ahead Tips
Once you’ve nailed the flavor, it’s important to store and serve the cheesecake correctly. Thus, follow these smart strategies:

Refrigeration:
Store the cheesecake in an airtight container or loosely cover it with foil. This helps prevent it from absorbing fridge odors. Proper storage extends shelf life to about 5 days.
Freezing for Later:
For longer storage, slice the cheesecake first. Then, wrap each piece in plastic wrap and store in freezer-safe containers. Thaw slices in the fridge for a few hours before serving.
Transport Tips:
Place the cheesecake in a sturdy container or cake carrier. Additionally, use frozen gel packs if traveling more than 30 minutes, especially in warm weather.
How to Make Keebler Cheesecake Recipe (Step-by-Step – Continued)
As we revisit the step-by-step guide, let’s go further into methods that enhance texture and structure. This ensures that the cheesecake holds up for longer gatherings or layered versions.
Step 8: Make it Layered (Optional)
You can add a layer of chocolate ganache, lemon curd, or jam between the crust and the cheesecake filling. To do this, spread a thin layer over the crust before adding the filling.
Step 9: Refrigerate Overnight (Recommended)
Although a four-hour chill is sufficient, an overnight rest leads to firmer texture and richer flavor. Thus, it’s highly recommended if you’re preparing the dessert ahead of a special event.
Step 10: Use a Hot Knife for Perfect Slices
To achieve clean cuts, dip a sharp knife in hot water before each slice. Wipe the blade after each cut to maintain presentation quality.
Extra Inspiration from the Kitchen
In fact, if you’re looking for something equally simple yet impressively creative, the sun-dried tomato and feta stuffed French toast on our site showcases how savory and sweet flavors can be layered in similar, quick-prep formats.
Alternatively, if you’re thinking about a lighter breakfast or post-dessert treat, our protein oatmeal guide offers balanced energy in just minutes—perfect for guests who prefer something less rich.
Frequently Asked Questions (FAQs)
Below, we address the most common questions about preparing, storing, and customizing this Keebler cheesecake recipe. These are based on actual user searches and practical kitchen experience.
What is the best way to soften cream cheese quickly?
You can leave cream cheese at room temperature for 30–45 minutes. Alternatively, microwave in 10-second intervals until soft but not melted. Always unwrap before microwaving.
Can I use a different crust than Keebler?
Absolutely! Oreo crust, homemade graham cracker crust, or even a digestive biscuit base can be used. However, Keebler’s ready-made crust saves time and ensures consistency.
How long does no-bake cheesecake last in the fridge?
Generally, it stays fresh for 4–5 days. For best results, keep it covered and stored in the coldest section of your refrigerator.
Can I freeze Keebler cheesecake?
Yes, this recipe freezes well. Wrap tightly in plastic wrap, then place in a freezer-safe container. Thaw in the fridge for 6–8 hours before serving.
Why is my cheesecake too soft or runny?
Common causes include under-whipping the cream, using low-fat cream cheese, or removing it from the fridge too early. Always chill thoroughly before slicing.
How do I make this cheesecake more festive?
Top it with seasonal fruit, colorful candy, or flavored whipped cream. Holiday options include crushed peppermint or cranberry sauce swirls.
What’s the difference between baked and no-bake cheesecake?
Baked cheesecake is denser, made with eggs, and cooked in an oven. No-bake versions rely on chilling for structure, resulting in a lighter, mousse-like texture.
Do I need gelatin to help it set?
No, this recipe sets beautifully with whipped cream and chilling. However, if you need extra firmness for outdoor events, a teaspoon of unflavored gelatin can help.
Can I make this recipe dairy-free?
Yes, use dairy-free cream cheese and coconut whipped topping. Although the flavor may slightly vary, the result will still be creamy and satisfying.
Conclusion
In summary, the Keebler cheesecake recipe is the ultimate crowd-pleasing dessert. Its ease of preparation, rich creamy texture, and adaptability make it perfect for everyday enjoyment or special celebrations. Whether you keep it classic or add your personal twist, this no-bake delight will become a regular in your dessert rotation.
Furthermore, the flexibility to use pantry staples, swap in toppings, and adjust textures gives this recipe wide appeal. With pro-level tips, FAQs, and storage tricks, you now have everything needed to master this dessert from crust to cream.
For more sweet and savory inspiration, feel free to browse our full recipes archive.


