
Soft, sweet, and irresistibly fluffy—recipe sweet dough forms the base of some of the most comforting and crave-worthy baked goods. From sticky cinnamon rolls that warm up a Sunday morning to golden braided loaves perfect for holidays, this versatile dough delivers consistent, bakery-quality results right from your kitchen.
As a matter of fact, sweet dough is more than just a recipe—it’s a building block for dozens of sweet treats that rely on richness, softness, and structure. Therefore, if you’ve ever admired the golden sheen and soft crumb of brioche, babka, or challah, you’ve already met the magic of sweet dough.
Table of Contents
Unlike plain bread dough, sweet dough contains enriching ingredients like sugar, butter, milk, and eggs. Consequently, these ingredients slow fermentation but create the pillowy softness and tender bite we associate with our favorite pastries. Throughout this guide, you’ll discover exactly how to master the process—step by step, ingredient by ingredient—with tips, insights, and some delightful surprises.
What Is Sweet Dough and How Is It Different From Regular Dough?
At first glance, sweet dough might look like any other bread dough. However, once you take your first bite, the differences become deliciously obvious. Sweet dough is enriched, which means it includes added fats, sugar, and often dairy to create softness, flavor, and structure.
Sweet dough often calls for milk instead of water, butter instead of oil, and eggs to add richness. Comparatively, a standard bread dough uses only flour, yeast, salt, and water. While this lean structure is ideal for crispy baguettes and chewy sourdoughs, it lacks the softness and delicate sweetness needed for cinnamon rolls or fruit breads.
Consequently, sugar and fat slow down yeast activity. Although this may sound like a drawback, it’s actually beneficial. This slower rise develops deeper flavor, a tender crumb, and a golden finish.
Moreover, sweet dough holds its shape beautifully. For example, you can braid it, twist it with fillings like cinnamon sugar or chocolate, or roll it into buns. It’s forgiving and adaptable. If you’re interested in other soft dessert bases, this peaches and cream cake recipe uses a similarly soft and indulgent base to support fruity flavors and creamy toppings.
Additionally, the enriched nature of sweet dough makes it more resilient to overbaking. Unlike lean doughs that dry out quickly, sweet dough remains moist and tender for days—especially if brushed with butter or lightly glazed after baking.
Another key point is that sweet dough often features in celebratory baking. Think of holiday breads with dried fruits and spices or filled rolls that grace the table during birthdays and brunches. Once you learn how to make sweet dough, your baking possibilities multiply exponentially.
Easy Recipe Sweet Dough: Ingredients & Step-by-Step Instructions
Making sweet dough might seem intimidating, especially if you’re used to quicker baking projects. However, once broken down into simple steps, it becomes easy—even relaxing. With this base recipe, you’ll be able to create bakery-style breads that impress every time.
Before mixing, gather all your ingredients. It’s important to have everything at the right temperature. Eggs should be room temperature, milk should be warmed, and butter should be melted but not hot.
Ingredients Table
| Ingredient | Amount | Notes |
|---|---|---|
| All-purpose flour | 3½ cups (420g) | Bread flour can be used for chewier texture |
| Whole milk | 1 cup (240ml) | Warmed to 105–110°F |
| Granulated sugar | ⅓ cup (67g) | Adds sweetness and feeds yeast |
| Unsalted butter | ¼ cup (57g) | Melted and cooled before adding |
| Eggs | 2 large | Room temperature ensures even mixing |
| Active dry yeast | 2¼ tsp (7g) | Make sure it’s fresh and not expired |
| Salt | 1 tsp | Balances the sweetness and enhances flavor |
Step-by-Step Instructions for Sweet Dough Perfection
Step 1: Activate the Yeast
Firstly, pour warm milk into a large bowl. Then stir in the sugar and sprinkle yeast on top. Let it sit for 5 to 10 minutes. Eventually, it should look foamy and smell slightly yeasty—this means your yeast is alive and ready to work.
Step 2: Add the Wet Ingredients
Once the yeast is activated, whisk in the eggs and melted butter. Make sure the butter isn’t hot, or it could scramble the eggs or kill the yeast. Stir until the mixture looks smooth and slightly golden.
Step 3: Mix the Dry Ingredients
Next, gradually add the flour and salt. Do this one cup at a time, mixing in between additions. If using a stand mixer, switch to the dough hook once all flour is added. Otherwise, mix with a wooden spoon and then knead by hand.
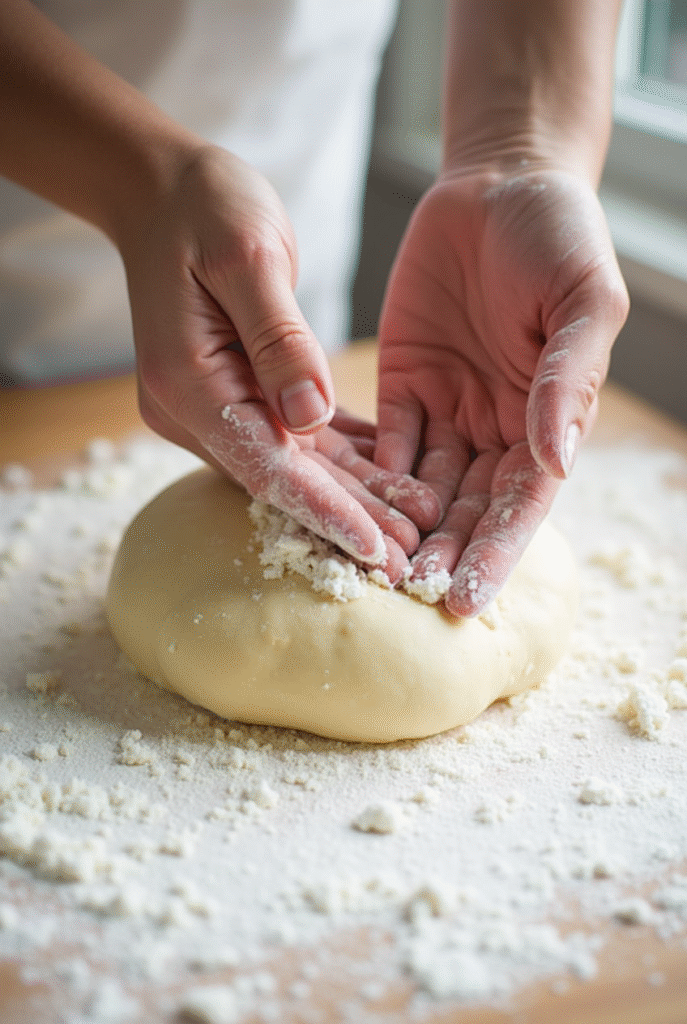
Step 4: Knead the Dough
Knead the dough for 8 to 10 minutes. It should become elastic, smooth, and slightly tacky. If it’s too sticky, add a tablespoon of flour at a time. However, don’t overdo it. Sweet dough should remain soft.
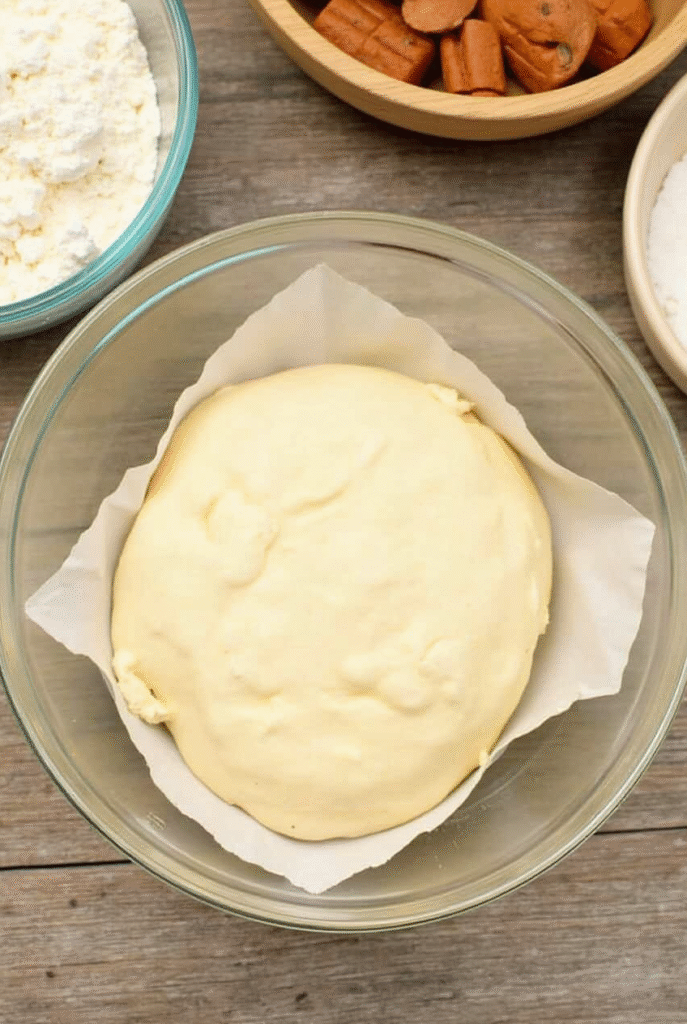
Step 5: Let It Rise (Proof #1)
Place the dough in a greased bowl, cover it with a towel, and let it rise for about 90 minutes. The dough should double in size. If your kitchen is cool, place the bowl in the oven with just the light on to create a warm environment.
Step 6: Shape the Dough
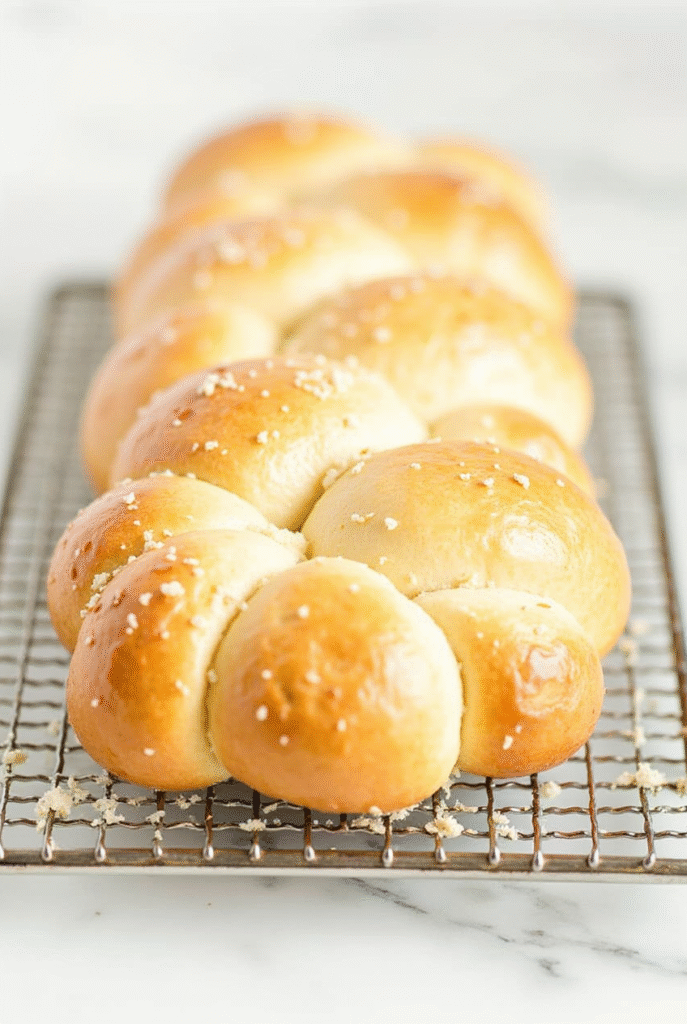
Once risen, gently punch the dough down. Then shape it into rolls, braids, knots, or spirals. This is your chance to get creative. You can add cinnamon sugar, nut fillings, or fruit zest during shaping.
Step 7: Second Proofing
After shaping, cover and let the dough rise again for 30 to 45 minutes. It should puff slightly and feel airy to the touch.
Step 8: Bake
Preheat your oven to 350°F (175°C). Bake for 20 to 25 minutes, or until golden brown. If baking smaller rolls, check after 18 minutes. When tapped, the bottoms should sound hollow.
Why Every Baker Should Master This Recipe Sweet Dough
Undeniably, learning how to make this dough opens up endless options. For instance, you can fill it with jam, layer it with chocolate, or twist it into festive shapes. In reality, few doughs are this versatile.
Furthermore, this dough freezes well. After the first rise, wrap it tightly and freeze it for up to one month. To use, thaw it overnight in the fridge, then let it come to room temperature, shape, and rise again before baking.
Additionally, flavor enhancements are easy. Add vanilla extract, orange zest, cardamom, or nutmeg to the dough before kneading. Each adds a unique twist and elevates the final product. These subtle flavors shine through in enriched dough, especially when paired with simple glazes or toppings.
If you’re exploring more ways to use sweet or creamy bases, consider the Keebler cheesecake recipe for another indulgent treat with a rich, dessert-friendly base.
In fact, many bakers make sweet dough in large batches and use it over a few days. One day might be cinnamon rolls. The next, maybe a savory cheese braid or filled pastry. The dough becomes more flavorful as it rests, making each use more delicious than the last.
Still Hungry? Try This Next
For more delicious and creative baking inspiration, explore our collection of rich, indulgent treats in the recipe collection. Whether you love fruity cakes, stuffed French toast, or hearty baked breakfasts, there’s something satisfying for every sweet tooth.
How to Make Recipe Sweet Dough Step-by-Step (continued)
Now that you’ve mastered the basics, it’s time to refine your process and push your baking skills further. Although the first proofing and kneading stages are foundational, the shaping, finishing, and baking are where the artistry of recipe sweet dough truly shines.
Shaping the Dough for Different Results
Firstly, your dough is ready to be shaped once it has doubled in size and feels light to the touch. Depending on what you’re baking, the shaping technique will vary. For instance, you might roll the dough into a rectangle for cinnamon rolls or braid it for a festive bread centerpiece.
Tip: Use a lightly floured surface to prevent sticking. Additionally, press the dough gently rather than rolling aggressively, which preserves the internal air structure.
Example: When shaping rolls, cut even pieces using a sharp knife or bench scraper. Then, roll them into balls by pulling the edges underneath and pinching the bottom—this gives a smooth, rounded top.
Adding Fillings and Flavors
Before the second rise, you can customize your dough with a wide range of fillings. For sweet options, cinnamon sugar, chocolate spread, and fruit preserves are popular. For savory twists, cheeses, herbs, and garlic butter provide delicious contrast.
Tip: Leave a ½-inch border on all sides when adding wet fillings to prevent leakage. Roll the dough tightly and pinch the edges to seal the roll before slicing or shaping.
Moreover, if you’re experimenting with savory variations, consider creating dough-based appetizers or brunch bites. For instance, you could use this sweet dough base to replicate the soft texture found in this chicken artichoke pizza, swapping the toppings while retaining the rich, tender crust.
Egg Wash, Baking, and Cooling
To give your rolls or loaves a professional finish, brush them with an egg wash before baking. The mixture (1 egg beaten with 1 tbsp of milk or cream) enhances browning and adds a glossy finish.
Tip: Sprinkle coarse sugar, nuts, or seeds on top after brushing for added texture and visual appeal.
Bake in a preheated 350°F (175°C) oven, placing the tray in the middle rack. Rotate it halfway through to ensure even browning. Rolls typically take 20–25 minutes, while larger braided loaves may need 30–35 minutes.
Warning: Sweet dough browns quickly due to its sugar content. If the top darkens too soon, tent loosely with foil to prevent burning while the center finishes baking.
Once baked, let your creations cool on a wire rack for at least 15 minutes. This allows the crumb to set and avoids soggy bottoms.
Pro Tips & Variations for Recipe Sweet Dough
Sweet dough is incredibly versatile and forgiving, which makes it perfect for experimentation. Therefore, don’t hesitate to try different ingredients or formats once you’re comfortable with the base process.
Add-Ins for Flavor and Texture
You can enrich your dough even more by incorporating mix-ins during kneading. For example, finely chopped dried fruits like cranberries or apricots work beautifully. Similarly, nuts like pecans or walnuts add crunch and complexity.
Tip: Keep mix-ins under ¾ cup to avoid overloading the dough and disrupting its structure.
Example: Add orange zest and dried cranberries to the dough, then shape it into a spiral and glaze with orange icing for a holiday-ready bread.
Savory Transformations
Despite its sweet base, this dough can take on savory notes with minor adjustments. Replace sugar with a tablespoon of honey, omit vanilla, and knead in grated cheese, fresh herbs, or garlic.
Tip: Serve these savory rolls warm with soup, salad, or even alongside seafood. For a gourmet brunch pairing, this lobster bisque with saffron infusion complements savory sweet dough bites in an unexpectedly luxurious way.
Storage and Freezing
Proper storage extends the life of your baked goods. Wrap completely cooled items in foil or place in airtight containers. Store at room temperature for up to 3 days, or freeze for up to one month.
Tip: For best texture, reheat frozen baked goods in a 300°F oven for 10–12 minutes. Avoid microwaving, which can make the texture rubbery.
FAQs About Recipe Sweet Dough
How to make an easy sweet dough?
To make an easy version of sweet dough, combine warm milk, sugar, and yeast. Once foamy, stir in eggs and melted butter. Gradually add flour and salt. Knead until smooth, rise until doubled, shape, rise again, and bake until golden. Each step builds softness and flavor.
What is the difference between sweet dough and regular dough?
Sweet dough contains sugar, eggs, and fat (like butter), making it richer and softer. Conversely, regular dough lacks these enrichments and produces a lean, chewy texture. Thus, sweet dough is ideal for desserts and soft breakfast breads.
What is the recipe for 3 ingredient play dough?
This play dough is non-edible but fun for kids. Mix 2 cups flour, 1 cup salt, and 1 cup water until a soft dough forms. You can also add food coloring for extra fun.
What can you make with sweet roll dough?
Sweet roll dough can be used for cinnamon rolls, sticky buns, fruit swirls, cream cheese spirals, or even monkey bread. Additionally, you can shape it into braids or pull-apart loaves for a stunning presentation.
Can I freeze sweet dough?
Yes, you can. After the first rise, wrap it in plastic and freeze. When ready to use, thaw overnight in the refrigerator, then bring to room temperature, shape, proof, and bake. This technique offers convenience without compromising quality.
Can I make this recipe ahead of time?
Absolutely. Prepare the dough in the evening and let it rise slowly overnight in the refrigerator. The next morning, shape it, allow the second rise, and bake. This method delivers fresh, warm pastries without morning prep stress.
Why is my sweet dough not rising?
The most common reasons include expired yeast, overheating the milk, or a cold proofing environment. Always use a kitchen thermometer to check milk temperature (105–110°F) and allow the dough to rise in a warm, draft-free spot.
Is sweet dough supposed to be sticky?
Yes, it should feel tacky but not overly wet. Because of its sugar and butter content, sweet dough is softer than traditional bread dough. Therefore, lightly flour your hands and work surface to manage stickiness without adding too much flour.
Conclusion
In conclusion, mastering recipe sweet dough is a game-changer for any home baker. Whether you’re crafting gooey cinnamon rolls, buttery fruit braids, or savory stuffed buns, this dough forms a reliable, tender, and flavorful base for countless delicious creations.
By understanding the science, technique, and creative potential of sweet dough, you gain the confidence to elevate everyday baking into something truly special. As you explore fillings, shapes, and pairings, this versatile dough becomes the key to countless comforting and crowd-pleasing dishes.
So the next time you’re in the kitchen, reach for this recipe. Let the aroma of fresh, rising dough and golden, baked rolls remind you just how satisfying homemade baking can be. With this guide in hand, every batch will be better than the last


